

Many pet owners worry about trimming their dog or cat’s nails. It’s easy to cut too far and hurt your pet, or leave nails too long and risk splits, snags, or even infections. The Dremel Pet Nail Grooming Kit offers a gentle solution. Instead of using sharp clippers, you use a rotary tool to carefully grind nails, making the process less stressful for both you and your pet. But before you start, you need to assemble the kit correctly. Doing this ensures safety, efficiency, and a good experience for your furry friend.
If this is your first time, don’t worry. This guide will walk you through every step, from opening the box to preparing for your first nail trim. You’ll learn which attachments to use, how to maintain the tool, and tips to keep pets calm.
Along the way, we’ll look at common mistakes, safety checks, and ways to solve problems. By the end, you’ll feel confident using your Dremel kit, saving money on vet visits and keeping your pet’s paws healthy at home.
Understanding The Dremel Pet Nail Grooming Kit
Before you assemble anything, take a moment to understand what’s inside your kit and why each part matters.
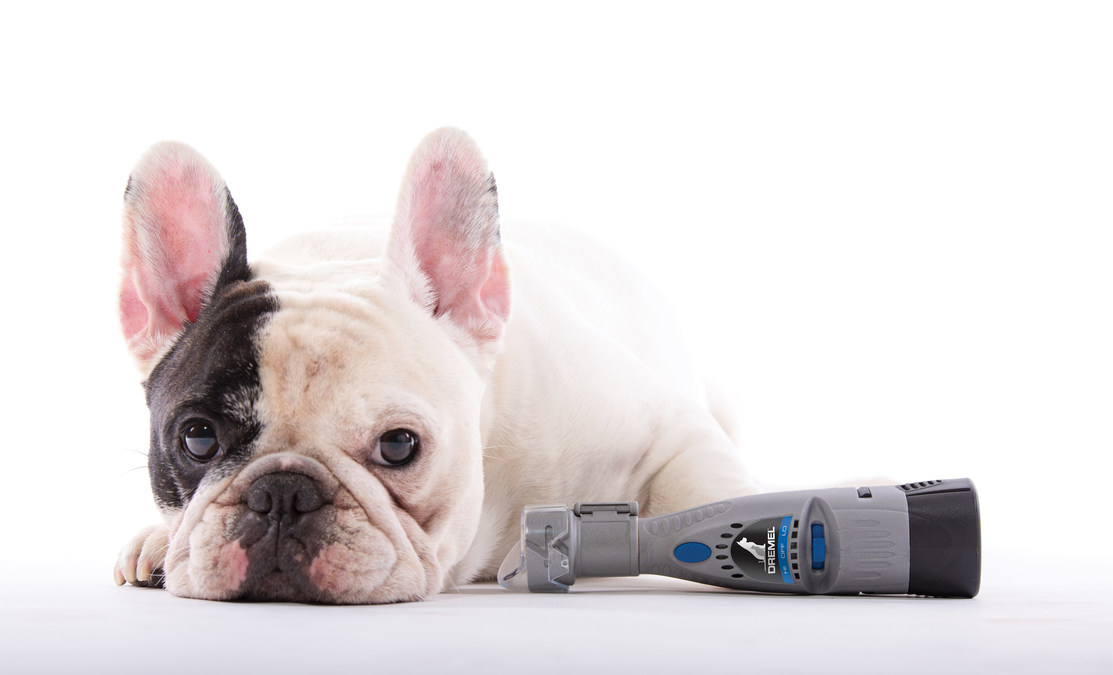
The Dremel Pet Nail Grooming Kit is a rotary tool specially designed for pet nails. Unlike regular Dremel tools used for DIY projects, this kit focuses on pet safety and comfort. The main components usually include:
- Dremel rotary tool (corded or cordless)
- Grinding drum (the part that spins and files the nail)
- Sanding bands (abrasive sleeves that fit onto the drum)
- Safety guard (optional, helps control nail length)
- Battery/charger (for cordless models)
- Wrench or tool for changing attachments
- User manual
Some kits also offer extra accessories like storage cases, USB chargers, or extra sanding bands.
Different Models And Their Features
Dremel offers several pet nail grooming tools, like the Dremel 7300-PT, Dremel 7760-PGK, and Dremel 7350-PET. While they all work similarly, there are differences in speed settings, battery life, and accessories.
Here’s a quick look at how three popular models compare:
| Model | Power Source | Speed Settings | Battery Life | Included Accessories |
|---|---|---|---|---|
| Dremel 7300-PT | Rechargeable Battery | 2 | ~3 hours | Drum, 4 sanding bands |
| Dremel 7760-PGK | USB Rechargeable | 4 | ~2 hours | Drum, 5 sanding bands, safety guard |
| Dremel 7350-PET | Rechargeable Battery | 1 | ~2 hours | Drum, 4 sanding bands |
If you’re not sure which model you have, check the label on your tool or the user manual.
Unboxing And Kit Inspection
Start by opening the box in a clean, well-lit area. Lay out all the pieces and check them against the parts list in your manual. Missing or damaged parts can make the process frustrating or even unsafe.
Inspect the following:
- Dremel tool: Look for cracks or loose switches.
- Grinding drum: Make sure it’s smooth and not bent.
- Sanding bands: Count how many are included; they wear out over time.
- Safety guard (if included): Ensure it isn’t cracked.
- Charger or batteries: Plug in the charger to test if it works.
- Wrench or small tool: Needed for changing the drum or band.
If anything is missing or broken, contact Dremel support before using the kit.
Charging And Power Preparation
If you have a corded model, just find a safe outlet. If your kit is cordless, charge it fully before your first use. This prevents mid-grooming power loss, which can stress your pet.
- First charge: Let the battery charge until the indicator shows full (often 2-3 hours).
- Tip: For most Dremel kits, a green light means full, yellow or red means low.
Never use the tool while charging unless the manual says it’s safe. Using a tool with a low battery can reduce speed, making nail grinding uneven or slow.
Understanding Each Attachment
Each part of the Dremel kit has a purpose. Knowing how they work will help you assemble the tool correctly.
Grinding Drum
This is the metal cylinder that actually spins and files the nail. It attaches to the Dremel tool’s shaft. You put a sanding band over the drum to create the abrasive surface.
Sanding Bands
These are rough sleeves that fit over the drum. They come in different grits, but most Dremel pet kits use 60-grit (coarse) or 120-grit (medium). Coarser bands are faster but can heat up quickly; finer bands are slower but smoother.
- Tip: Use a fresh sanding band each session for best results.
Safety Guard
Some models have a plastic guard that helps control how much nail you remove. It also keeps fur away from the spinning drum.
Wrench/tool
A small wrench is included to tighten or loosen the drum and change sanding bands.
Step-by-step Assembly Instructions
Now that you know the parts, let’s assemble the kit. These steps work for most Dremel Pet Nail Grooming Kits, but always check your manual for special instructions.
1. Insert Or Charge The Battery
If your tool uses a removable battery, insert it firmly. For built-in batteries, make sure the tool is fully charged. Plug in corded models securely.
2. Attach The Grinding Drum
- Hold the Dremel tool so the shaft is facing you.
- Find the small silver button near the tip (the shaft lock).
- Press and hold the shaft lock to stop the shaft from turning.
- Use the wrench to loosen the collet nut (the piece at the very end).
- Slide the grinding drum onto the shaft.
- Tighten the collet nut with the wrench while holding the shaft lock.
Insight: Many beginners forget to hold the shaft lock, causing the whole tool to spin instead of loosening the nut. Always press the lock before turning the nut.
3. Slide On A Sanding Band
- Choose a fresh sanding band.
- Push it over the grinding drum until it sits evenly.
- If the band is loose, tighten the small screw on top of the drum (if present).
Tip: A loose sanding band can fly off during use. Make sure it feels snug.
4. Attach The Safety Guard (optional)
If your kit includes a safety guard:
- Line up the slots on the guard with the tool’s nose.
- Press it on until it clicks or screws in place.
- Adjust as needed so the opening matches your pet’s nail size.
Some pets have long fur. In these cases, the safety guard helps avoid accidents.
5. Final Safety Check
- Spin the drum by hand to check that nothing is wobbly.
- Make sure the sanding band is even and secure.
- Turn the tool on for a few seconds (away from your pet) to check for vibrations or odd noises.
If you hear rattling or see the band wobbling, recheck all attachments.
Preparing Your Pet For Nail Grooming
Even with the tool ready, your pet’s comfort is key. Many animals fear loud sounds or new objects. Take these steps before starting:
- Introduce the tool: Let your pet sniff the Dremel while it’s off. Give a treat.
- Turn it on nearby: Run the tool near your pet (without touching nails). Reward calm behavior.
- Touch paws gently: Practice holding your pet’s paw and pressing the Dremel (off) against the nail.
- Keep sessions short: For the first few times, only do 1-2 nails, then stop.
Common Mistake: Rushing
Trying to do all nails at once can make your pet scared of the tool. Build up slowly for better results.
Setting Up Your Work Area
Choose a spot that’s comfortable and has good lighting. You’ll need:
- A sturdy table or lap
- Towel for catching nail dust
- Treats for rewards
- Styptic powder or cornstarch (in case of bleeding)
- The Dremel tool and accessories
Tip: Some owners use a helper to hold the pet still. This can reduce stress for both you and your animal.
Using The Right Sanding Band Grit
Most pet owners use the standard 60-grit band for thick nails and 120-grit for finishing or small pets. Here’s a quick grit comparison:
| Grit | Best For | Speed | Heat Buildup | Smoothness |
|---|---|---|---|---|
| 60 | Large dogs, thick nails | Fast | High | Rough |
| 120 | Small dogs, cats, finishing | Medium | Low | Smooth |
Switch bands if you notice the tool isn’t grinding as easily or if nails are getting hot.
How To Hold The Tool And Your Pet
Proper grip is important for safety and control.
- Hold the tool like a pencil, near the tip for better control.
- Hold your pet’s paw firmly but gently.
- Only grind a little at a time, checking the nail often.
If your pet squirms, pause and try again later. Never force the process.
First Use: Test Run
Before working on your pet, do a test run:
- Turn on the tool to the lowest speed.
- Touch the sanding band to a scrap piece of wood or nail (if available).
- Check for any slippage or wobbling.
- Adjust speed as needed.
Insight: Higher speeds grind faster but create more heat and noise. Most pets prefer lower speeds, even if it takes longer.
Maintenance And Cleaning After Use
To keep your Dremel kit working well:
- Remove the sanding band and drum after each session.
- Brush off nail dust with a small brush or cloth.
- Wipe the tool body with a dry cloth.
- Charge the battery after each use (cordless models).
- Store everything in the case or a safe drawer.
Replace sanding bands when they look smooth or clogged.
Common Problems And Troubleshooting
Even with careful assembly, issues can pop up. Here’s how to solve the most common ones:
Sanding Band Slips Off
- Make sure the screw on top of the drum is tight.
- Use the correct size band for your drum.
- Replace worn-out bands.
Tool Vibrates Excessively
- Check if the drum is mounted straight.
- Try a different sanding band.
- Make sure the shaft lock and collet nut are tight.
Tool Doesn’t Turn On
- Check the power switch and battery charge.
- For corded models, test another outlet.
- If nothing works, contact Dremel support.
Nail Gets Hot
- Use lower speed.
- Grind for 2-3 seconds, then stop and check.
- Switch to a new sanding band if needed.

Credit: polienvasestransparentes.com
Safety Tips For Pet Nail Grooming
- Always check the nail for the quick (pink part inside the nail).
- Trim a little at a time to avoid hitting the quick.
- Stop if your pet pulls away or seems stressed.
- Keep styptic powder nearby in case of bleeding.
- Never let fur get near the spinning drum.
- Clean the tool after each use to prevent bacteria growth.
Comparing Dremel To Traditional Nail Clippers
Many owners switch to the Dremel kit because it’s less likely to split nails or cut the quick. Here’s a side-by-side comparison:
| Feature | Dremel Grooming Kit | Traditional Clippers |
|---|---|---|
| Risk of cutting quick | Low | High |
| Noise | Moderate | Silent |
| Smooth finish | Yes | No (often sharp edges) |
| Learning curve | Medium | Low |
| Pet anxiety | Varies (noise can bother some) | Varies (pressure can bother some) |
Credit: www.prnewswire.com
Cleaning And Storing Your Dremel Kit
After each session, good cleaning keeps your tool safe and long-lasting.
- Remove all dust from the tool, drum, and bands.
- Do not use water on electric parts.
- Store accessories in the provided case, away from moisture.
- Charge your battery before putting away (cordless models).
If you use the tool outside, wipe it down to remove pet hair and dirt.
When To Replace Parts
Sanding bands and drums wear out with use. Here’s when to replace them:
- Sanding band: When the surface feels smooth or clogged.
- Grinding drum: If it’s bent, cracked, or won’t hold bands.
- Battery: If it won’t hold a charge or only runs for a few minutes.
Dremel sells replacement accessories at most pet or hardware stores. Use only genuine parts to keep your tool working safely.
Tips For A Stress-free Nail Trim
- Trim nails after a walk or bath (they’re softer).
- Give treats before, during, and after grooming.
- Work in a quiet room to avoid distractions.
- For long-haired pets, trim fur around nails first.
- Take breaks if your pet gets nervous.
Experience-based tip: If your pet panics at the sound, try running the Dremel behind a closed door for a few days before the session. This helps desensitize them to the noise.
Advanced Usage: Adjusting Speed And Technique
Some Dremel kits have multiple speed settings. For most pets:
- Start on the lowest speed.
- Increase slowly if needed for thick nails.
- Never use the highest speed for small pets.
Technique: Touch the nail gently and move the tool in small circles. Check the nail every few seconds to avoid heat buildup.
If you want a perfectly smooth edge, finish each nail with a finer grit band and lighter pressure.
Understanding Heat Buildup
Rotary tools can create heat quickly. If nails get too hot, your pet may dislike future sessions.
- Always work in short bursts (2–3 seconds per nail).
- Check nails often for warmth.
- Let the tool rest if it gets hot.
Non-obvious insight: Heat isn’t just uncomfortable—it can actually damage the sensitive quick. Always stay aware of temperature.
What To Do If You Cut The Quick
Even with care, it’s possible to grind too far. If you see blood:
- Stay calm. Your pet will sense your stress.
- Apply styptic powder or cornstarch to stop bleeding.
- Give your pet a break and lots of comfort.
- Wait a few days before trying again.
Tip: Most pets forgive quickly if you stay positive and calm.
Benefits Of Home Nail Grooming
- Saves money: Professional trims can cost $10–$30 each time.
- Reduces stress: No travel or waiting at the vet.
- Improves pet health: Regular trims prevent splits, snags, and posture problems.
With practice, most owners find that home grooming becomes easy and even enjoyable.
Important Mistakes To Avoid
- Using a dull sanding band: This makes grinding slow and hot.
- Skipping the safety check: Loose parts can cause injury.
- Grinding too long on one nail: This causes heat and pain.
- Ignoring your pet’s signals: If your pet pulls away, stop.
- Not cleaning the tool: Old nail dust can spread germs.
Avoiding these mistakes keeps your pet safe and happy.

Credit: www.youtube.com
Where To Find Replacement Parts And Support
You can find official Dremel accessories at most major pet stores, hardware stores, and online. For technical support, visit the Dremel Support Center.
Always use genuine parts to avoid tool damage or safety issues.
Frequently Asked Questions
How Often Should I Change The Sanding Band?
Replace the sanding band whenever it feels smooth, clogged, or if it starts to slip during use. For most pet owners, this means a new band every 2–4 sessions, depending on pet size and nail thickness.
Can I Use Regular Dremel Attachments For Pet Nails?
No, always use attachments designed for pet grooming. Regular Dremel bits are too rough and can injure your pet’s nails or paws. Pet-specific sanding bands and drums are safer and fit the tool correctly.
What If My Pet Is Scared Of The Dremel Noise?
Start by letting your pet hear the tool from a distance, paired with treats. Gradually move closer over several days. If your pet remains fearful, try trimming one nail per session or use a quieter model.
How Can I Tell If I’m Grinding Too Close To The Quick?
Watch for a small dark or pink oval appearing in the center of the nail. Stop grinding when you see it. On dark nails, go slowly and check often. If unsure, trim less and do nails more frequently.
Is The Dremel Pet Nail Grooming Kit Safe For Cats Or Small Animals?
Yes, but use the lowest speed and a fine grit band. Hold your pet gently, and only trim a little at a time. Always monitor for stress and stop if your pet seems uncomfortable.
Caring for your pet’s nails at home may feel challenging at first, but with the right tools and patience, it becomes an easy routine. The Dremel Pet Nail Grooming Kit, when assembled and used properly, keeps your pet’s paws healthy and your bond strong.
Regular practice will make each session smoother. Soon, you and your furry friend will both feel at ease with nail grooming.