
If your dog’s LED collar feels too loose or bulky, you’re probably wondering how to shorten it safely and effectively. A collar that fits just right keeps your furry friend comfortable and secure, especially during nighttime walks.
In this guide, you’ll discover simple steps to adjust your LED dog collar without damaging it. Keep reading to learn how to make your dog’s collar perfect for every adventure, so you both enjoy peace of mind and style.
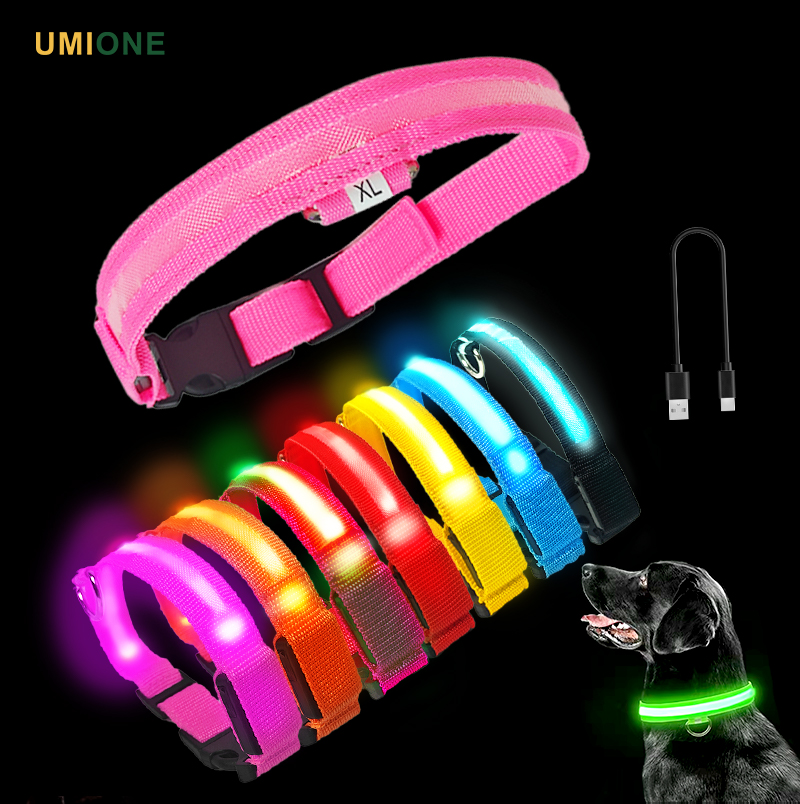
Choosing The Right Led Collar
Choosing the right LED collar is key for your dog’s safety and comfort. The collar must fit well and suit your dog’s needs. A collar that is too loose or too tight can cause discomfort or fall off. Selecting the right style and size helps keep your dog visible in the dark. This section guides you through the main points to consider.
Sizing Your Dog’s Neck
Measure your dog’s neck with a soft tape measure. Leave space for two fingers to fit comfortably. This ensures the collar is not too tight or loose. Check the collar’s size chart before buying. Some collars offer adjustable lengths for better fit. Regularly check the collar fit as dogs grow or gain weight. Proper sizing prevents chafing and slipping.
Types Of Led Collars
LED collars come in several types based on light source and design. Some have flashing lights to attract more attention. Others offer steady glow modes for constant visibility. Choose between rechargeable or battery-powered collars. Rechargeable collars save money and reduce waste. Battery-powered ones are easy to replace quickly. Pick a collar with durable materials to handle dog activities. Brightness and light color also affect visibility.

Credit: www.amazon.com
Tools Needed For Shortening
Shortening an LED dog collar requires specific tools to ensure a clean and safe adjustment. Having the right tools helps make the process smooth and efficient. It also prevents damage to the collar and keeps your pet safe.
Gathering all necessary tools before starting saves time and avoids frustration. Each tool plays a role in cutting, measuring, or securing the collar properly. Understanding these tools helps you complete the task with confidence.
Essential Tools List
- Measuring tape or ruler for accurate length measurement
- Sharp scissors or wire cutters to trim the collar
- Screwdriver or small pliers to remove or adjust hardware
- Heat shrink tubing or electrical tape to seal cut ends
- Marker or pen to mark where to cut
- Safety gloves to protect your hands during cutting
Safety Precautions
Always wear safety gloves to avoid cuts or injuries. Cut slowly and carefully to maintain control. Keep the collar away from your pet during the process. Avoid cutting near electrical parts unless you know how to handle them. Work in a well-lit area to see clearly. Double-check measurements before cutting to prevent mistakes.
Preparing The Collar
Preparing your LED dog collar for shortening is an important step. It keeps the collar safe and easy to work with. You must handle the collar carefully. This avoids damage and keeps the LED lights working well.
Start by taking off parts that can get in the way. This makes the collar easier to cut and adjust. You need to remove the battery pack first. Then, take off the collar buckle. These steps help you get the right size for your dog.
Removing The Battery Pack
Find the battery pack on the collar. It is usually small and clipped or snapped in place. Gently press the clips or screws holding it. Pull the battery pack away from the collar strap. Be careful not to pull too hard. Keep the battery pack safe for later use.
Detaching The Collar Buckle
Locate the collar buckle next. It fastens the collar around your dog’s neck. Look for small screws or clips that hold the buckle. Use a screwdriver or your fingers to remove them. Take the buckle off the collar strap carefully. This gives you a clean strip to shorten.
Credit: rasytojai.lt
Measuring And Marking
Measuring and marking the LED dog collar correctly is the first step to a perfect fit. This step helps avoid cutting too much or too little. Careful measurement ensures your dog stays comfortable and safe. Take your time to get it right before making any cuts.
Finding The Perfect Length
Start by placing the collar around your dog’s neck. Leave enough room for two fingers to fit between the collar and the neck. This space keeps the collar snug but not tight. Use a soft measuring tape or a piece of string to measure the length. Note the measurement carefully to avoid mistakes.
Marking The Cut Line
Lay the collar flat on a clean surface. Use a fine marker or a pencil to mark the exact spot to cut. Double-check the mark by comparing it to your measurement. Draw a straight line across the collar for a clean cut. Clear marking helps you cut accurately and safely.
Cutting The Collar Strap
Cutting the collar strap is an important step in adjusting an LED dog collar. It helps fit the collar perfectly to your dog’s neck. Careful cutting ensures the collar stays strong and looks neat.
Measure the length needed before cutting. Mark the spot clearly. Cutting too short can make the collar useless. Take your time to avoid mistakes.
Using Sharp Scissors
Use sharp scissors for a clean cut. Dull scissors can make the strap edges jagged. Sharp scissors cut through the material easily and smoothly. This makes the strap look professional and neat. Hold the strap tight but not stretched while cutting.
Avoiding Frayed Edges
Frayed edges can weaken the collar strap. Use a lighter or candle flame to melt the edges slightly. Do this carefully and quickly to avoid damage. This seals the ends and prevents fraying. Check the edges after cutting and seal if needed.
Reassembling The Collar
After shortening your LED dog collar, reassembling it properly is important. This step ensures the collar stays secure and works well. Take your time to fit each part carefully. A well-assembled collar keeps your dog safe and comfortable.
Reattaching The Buckle
Start by aligning the buckle with the collar ends. Push the collar through the buckle slots. Make sure it fits tightly and does not slip. Test the buckle by clicking it closed. It should hold firmly without moving.
Securing The Battery Pack
Place the battery pack back into its holder. Check that the pack fits snugly and does not move. Use the clips or Velcro straps to fasten it. This prevents the battery from falling out during walks. Confirm the LED lights work before finishing.
Testing The Fit And Light
Testing the fit and light of your LED dog collar is a key step after shortening it. This ensures your dog stays safe and comfortable. You need to check both the collar size and the LED lights. Proper fit prevents discomfort or slipping. Fully working lights keep your dog visible in the dark.
Ensuring Comfort
Place the collar around your dog’s neck. Leave enough space for two fingers to fit under it. This prevents tightness or chafing. Watch your dog move and check for signs of discomfort. Adjust the collar length if it feels too loose or too tight. A well-fitted collar stays in place without pressing on the skin.
Checking Led Functionality
Turn on the LED lights after fitting the collar. Check that all lights shine brightly and evenly. Walk your dog in a dark area to see the collar glow. Make sure the lights are visible from all sides. Replace batteries if any light looks dim or flickers. Bright lights help keep your dog safe during night walks.
Maintenance Tips For Led Collars
Maintaining your LED dog collar keeps it bright and safe for your pet. Proper care helps the collar last longer. Small efforts can prevent damage and keep the lights shining clearly.
Cleaning And Care
Clean the collar regularly to remove dirt and grime. Use a damp cloth with mild soap. Avoid harsh chemicals that may harm the LED lights. Dry the collar fully before use. Check for any loose parts or damage. Store the collar in a cool, dry place when not in use.
Battery Replacement
Replace the batteries as soon as the light dims. Use the correct battery type recommended by the manufacturer. Turn off the collar before changing batteries to avoid short circuits. Keep spare batteries handy for quick replacements. Proper battery care ensures your collar stays bright and safe for night walks.

Credit: epinvest.ro
Frequently Asked Questions
How Do I Safely Shorten An Led Dog Collar?
To shorten an LED dog collar, measure your dog’s neck first. Cut excess strap carefully without damaging the wiring. Use a lighter or heat tool to seal the strap end. Avoid cutting the LED lights or battery compartment for safety.
Can I Shorten Any Brand Of Led Dog Collar?
Most LED dog collars with adjustable straps can be shortened. However, collars with fixed wiring or integrated batteries may not be suitable. Always check the product manual to avoid damaging electronics. If unsure, consult the manufacturer or buy a smaller size.
What Tools Are Needed To Shorten An Led Dog Collar?
You will need scissors or a sharp knife, a lighter or heat tool, and possibly a sewing kit. Use scissors to cut the strap, then seal the end with heat to prevent fraying. Sewing may be required for securing the strap after shortening.
Will Shortening Affect The Collar’s Led Functionality?
If done carefully, shortening won’t affect the LED lights. Avoid cutting near the wiring or battery area. Proper sealing prevents damage and keeps the collar waterproof. Always test the collar before and after shortening to ensure full functionality.
Conclusion
Shortening an LED dog collar is simple and quick. Measure your dog’s neck carefully. Cut the collar to fit comfortably, not too tight. Secure the ends properly to avoid fraying. Test the collar to ensure the light still works. A well-fitted collar keeps your dog safe and visible.
Small changes make a big difference during walks at night. Follow these steps to adjust the collar easily and safely. Your dog will stay comfortable and bright wherever you go.